2022. 10. 24. 14:23ㆍAI/프로그래머스 AI 코스
장고의 구조


수정사항마다 4가지 관계를 고려해서 모두 수정해주어야함
URL - urls.py파일에서 view.py의 함수를 import
View - views.py에서 url에서의 동작을 define
DB - model.py에서 Db의 구조 정의(Class와 column 정의)
Template - .html 파일
urls.py - view.py (+model.py) - 'abc.html'
개발 환경 세팅
#version
python 3.10
django 4.1


# 프로젝트 생성 : 프로젝트의 config 폴더와 manage.py 파일 생성
django-admin startproject config .

# pybo 앱 생성 : 프로젝트의 구성하는 하나의 app 생성
django-admin startapp pybo

# 서버 실행
python manage.py runserver

# timezone
TIME_ZONE = "Asia/Seoul"

# 언어 설정
LANGUAGE_CODE = "ko-kr"

# template 폴더 정보 추가 - setting.py에 TEMPLATES
TEMPLATES = [
    { ...
        "DIRS": [os.path.join(BASE_DIR, "pybo", "template")], ...	# template 폴더 경로 추가
# app 정보 추가 - setting.py에 INSTALLED_APPS 변수에 내용 추가
INSTALLED_APPS = [...
    'pybo', ...]	# app 폴더명 추가
URL mapping 추가
# config/urls.py
from pybo import views
urlpatterns = [
    path("admin/", admin.site.urls),
    path('pybo/', views.index)
]
view.py 에 함수 추가
# pybo/views.py

from django.http import HttpResponse
def index(request):
    return HttpResponse('hello')		# 간단 HttpResponse 타입으로 string 전달
    return render(request, 'index.html', # index.html 파일을 이용해서 page rendering
    {'my_name' : name, "my_list" : my_list})	# index.html에 전달할 arg


from .models import Coffee		# DB에서 Coffee 라는 class(테이블) import

def coffee_view(request):
    coffee_all = Coffee.objects.all()   # SELECT * FROM Coffee

    return render(request, 'coffee.html',
    {"coffee_list" : coffee_all})		# Db에 있는 Coffee 테이블의 데이터를 coffee.html로 전달
URL 분리
# config/url.py
from django.urls import path, include		# include 함수 사용
from pybo import views

urlpatterns = [
    path("admin/", admin.site.urls),
    path('pybo/', include('pybo.urls')),	# pybo app의 url은 'pybo.urls' 참조
    ]
pybo/urls.py 만들기
# pybo/urls.py
from django.urls import path
from . import views

urlpatterns = [path("", views.index),]	# url = /pybo/
# config/urls.py에서 /pybo/로 연결되는 url을 pybo/urls.py로 연결하였고,
# path("test", veiw.text)인 경우 최종 url은 pybo/test가 된다
이미지 출력
이미지 경로
pybo\static\pybo\cat.jpg
# HTML 문서에 코드 입력
{% load static %}
    <img src="{% static '/pybo/cat.jpg' %}" alt="My image">		# image 경로 지정
DB 관리
Model.py 수정, ORM 방식으로 db 관리하며 테이블은 class로 생성
# models.py
class Coffee(models.Model):
    name = models.CharField(default = "", null = False, max_length = 30)
    price = models.IntegerField(default = 0)
    is_ice = models.BooleanField(default = False)
admin에 Coffee class를 연결하면 /admin 페이지에서 db를 관리할수 있다
# admin.py
from django.contrib import admin
from .models import Coffee		# DB class를 import

# Register your models here.
admin.site.register(Coffee)		# admin 페이지에 Coffee를 추가
superuser 만들기
python manage.py createsuperuser
# 사용자 이름, 이메일 주소, 비밀번호 입력
/admin 에서 로그인하고 admin.py 에 등록된 모델을 관리할수 있다
 |
 |
변경내용 반영이 안될때 -- migrate 하기

python manage.py makemigration pybo		# 'pybo' 라는 app의 변경내용 migration 만들기
python manage.py migrate		# 현재까지 만들어진 migration을 migrate 진행

python manage.py showmigration # 현재까지 만들어진 migration 확인
Form 만들기
form class 만들기
# form.py
from django import forms

from .models import Coffee  # Model 호출

class CoffeeForm(forms.ModelForm):  # ModelForm을 상속받는 Coffee
    class Meta:
        model = Coffee
        fields = ('name', 'price', 'is_ice')
view.py에서 form object를 .html로 전달
# view.py
from .forms import CoffeeForm		# form.py에서 CoffeeForm 클래스 import

def coffee_view(request):
    coffee_all = Coffee.objects.all()   # SELECT * FROM Coffee
    form = CoffeeForm()		# form 객체 생성

    return render(request, 'coffee.html',
    {"coffee_list" : coffee_all, "coffee_form" : form})		# form
.html에서 장고 form 표현
<form>
        {{ coffee_form.as_p}}	# .as_p로 나타내기
    </form>
CSRF 검증 실패 오류
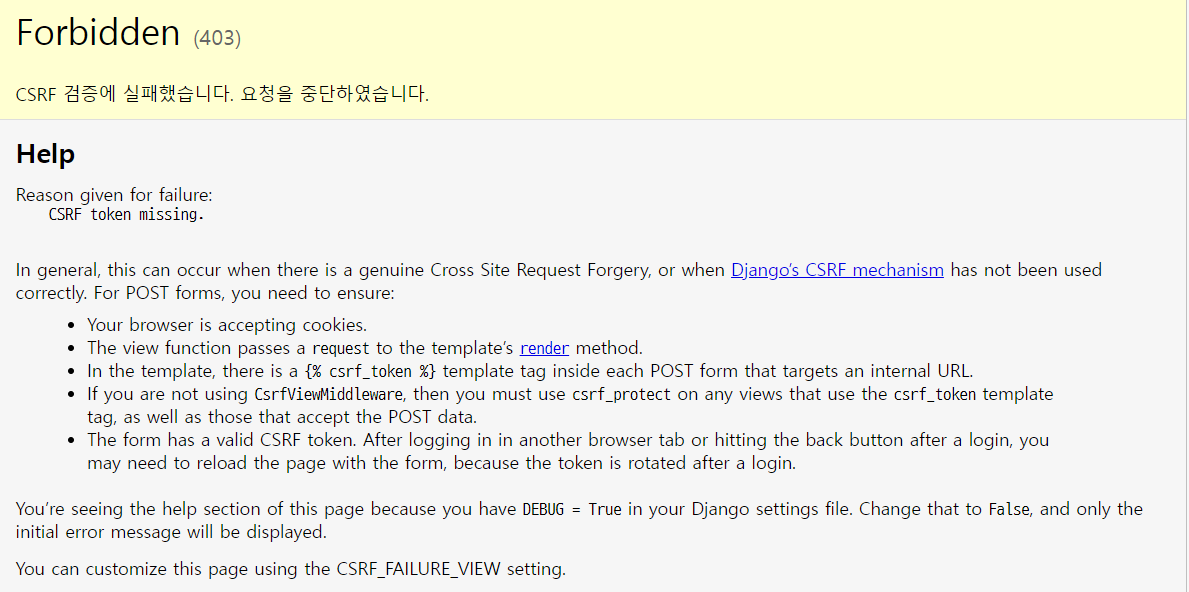
csrf 토큰 생성하기
<form method="POST"> {% csrf_token %}		# form 내에 {% csrf_token %} 추가
        {{ coffee_form.as_p}}
        <button type = 'submit'>Save</button>
</form>
https://eunjin3786.tistory.com/133
ORM 테이블 만들기
from django.db import models
class Orm(models.Model):
	def __str__(self):	# 데이터 조회시 default는 id가 출력, 출력할 내용으로 함수로 작성할수 있다
    	return self.name

	name = models.CharField(default = "", null = False, max_length = 30)
    price = models.IntegerField(default = 0)
    is_ice = models.BooleanField(default = False)
ORM 테이블 객체 생성
o = Orm(name = 'ice americano', price = 2000, is_ice = True)	# 데이터 한개의 열생성
o.save()		# 데이터 추가
데이터 조회
o.id			# id 출력
Orm.objects.all()		# 모델의 전체 데이터 조회
Orm.objects.filter(id=1)	# filter로 전체 데이터에서 조건에 맞는 데이터(여러개) 추출
Orm.objects.get(id=1)	# 조건에 맞는 데이터 1개 출력
Orm.objects.filter(name__contatins = 'ice')	# name 속성에 ice가 포함되는 데이터 추출
ORM 데이터 수정
o = Orm.objects.get(name = 'ice americano')
o.name = 'latte'
o.save()
ORM 데이터 삭제
o = Orm.objects.get(name = 'latte')
o.delete()
HTML form으로 전달받은 value들을 template에 보여주기
POST method일때, 유효한 form에 한해서 save하고 rendering 진행
# view.py

def coffee_view(request):
    coffee_all = Coffee.objects.all()   # SELECT * FROM Coffee
    # 만약 request가 POST라면
        # POST를 바탕으로 Form을 만들고
        # Form이 유효하면 저장

    if request.method == 'POST':		# method가 POST일때만
        form = CoffeeForm(request.POST) # 완성된 Form
        if form.is_valid(): # 완성된 Form이 유효하다면:
            form.save()     # Form을 model에 저장

    return render(request, 'coffee.html',
    {"coffee_list" : coffee_all, "coffee_form" : form})
장고에서 form 만들기
forms.Form을 상속받으면 폼, forms.ModelForm을 상속받으면 모델 폼이라 한다
# forms.py

from django import forms
from .models import Coffee  # models.py 에서 정의한 class import

class CoffeeForm(forms.ModelForm):  # forms.ModelForm을 상속받는 Coffee
    class Meta:
        model = Coffee
        fields = ('name', 'price', 'is_ice')

        # 장고폼에 style 만들기,
        # .as_p로 입력항목을 생성할경우 부트스트랩을 적용할수 없어서 widgets 속성을 만든다
        widgets = {
            'name' : forms.TextInput(attrs={'class': 'form-control'}),
            'price' : forms.TextInput(attrs={'class': 'form-control'}),
        }
URL에서 인수 전달 받기
url.py 에서 url과 (<type:arg_name>/) 호출 함수 지정
# urls.py
urlpatterns = [path("<int:question_id>/", views.detail),    ]

# views.py
def detail(request, question_id):
	return HttpResponse('arg is %s' %question_id)
URL name과 namespace
urls.py에서 url의 name과 app_name 설정
# urls.py
app_name = 'pybo'

urlpatterns = [path("<int:question_id>/", views.detail, name = 'detail'),	]
템플릿에서 namespace 만들기
<a href = "/pybo/{{ question.id}}/">		# 하드코딩
<a href = "{% url 'pybo:detail' question.id %}">	# 네임스페이스와 별칭사용
get_object_or_404
get object에 실패하면 debug 화면대신 404 화면 출력
# view.py
def action(request, question_id):
	c = get_object_or_404(Coffee, id=question_id)	# model class와 arg 전달
...<form method="POST"> {% csrf_token %} # Method 정하기
ID : <input type="text" name="id"> # input form 은 text 타입, name = 'id'
<button type = 'submit'>Delete</button> # submit 타입의 버튼
</form>view.py에서 arg로 동작 정의
템플릿(html)에서 정의된 name을 request.<method>.get()으로 가져오기
id = request.POST.get('id')     # POST request에서 name='id' 값을 받아온다
c = get_object_or_404(Coffee, id=id)    # model의 데이터를 받아오며, 없을경우 404 출력
c.delete()      # 데이터 delete
CSS 사용
static file을 추가할 디렉토리 경로 정보 추가
# settings.py

STATIC_URL = "static/"
STATICFILES_DIRS = [BASE_DIR / 'pybo/static/pybo', ]	# STATICFILES_DIRS 추가
style.css 생성
# static/style.css

input[type=submit]{
    margin-top:10px
}
템플릿에 스타일 적용
# .html 파일에 아래 코드 적용

# static load
{% load static%}

# css file 연결 또는 link 연결
<link rel="stylesheet" href="{% static 'css/bootstrap.min.css' %}">	# css file을 경로
<link href="https://cdn.jsdelivr.net/npm/bootstrap@5.2.2/dist/css/bootstrap.min.css" rel="stylesheet" integrity="sha384-Zenh87qX5JnK2Jl0vWa8Ck2rdkQ2Bzep5IDxbcnCeuOxjzrPF/et3URy9Bv1WTRi" crossorigin="anonymous">


# table에 style 적용
<body>
    <h1>Coffee List</h1>
    <div class="container my-3">	# class명 지정
        <table class="table">
            <thread>
                <tr class="thread-dark">
                    <th>번호</th>
                </tr>
            </thead>
            <tbody>

    {% for element in coffee_list %}
    <tr>
        <td> {{element.id}}</td>
        <td> {{element.name}}</td>
        <td> {{element.price}}</td>
    </tr>

    {% endfor%}
</tbody>
</table>
</div>
템플릿 상속
base.html을 상속받아서 모든 템플릿에 적용하기
# base.html

{% load static%}
<!doctype html>
<html lang='ko'>
    <head>
        <!-- Required meta tags-->
        <meta charse = 'utf-8'>
        <meta name = 'viewport' content='width=device-width, initial-scale=1, shrink-to-fit=no'>
        <!-- Bootstrap CSS -->
        <link rel="stylesheet" type = 'text/css' href="{% static 'css/bootstrap.min.css' %}">
        <!-- pybo CSS-->
        <link rel="stylesheet" type = 'text/css' href="{% static 'css/style.css' %}">
        <title>Hello, pybo!</title>
    </head>
    <body>
        <!-- 기본 템플릿 안에 삽입될 내용 start -->
        {% block content %}
        {% endblock %}
        <!-- 기본 템플릿 안에 삽입될 내용 end -->
    </body>
</html>
상속 받는 html
# extend.html

{% extends 'base.html' %}
{% block content %}

<!-- content 작성 -->

{% endblock %}
CSS로 네비게이션바, 로그인 버튼 만들기
bast.html에 기능을 추가하고 템플릿에서 상속한다
# base.html

<!-- 네비게이션바  -->
        <nav class = 'navbar navbar-expand-lg navbar-light bg-light border-bottom'>
            <a class = 'navbar-brand' href ="{% url 'pybo:home'  %}">pybo</a>
            <!-- 화면 크기에 따라서 버튼의 모양이 바뀐다 -->
            <!-- 작은 화면일때 햄버거 메뉴 버튼 -->
            <button class = 'navbar-toggler ml-auto' type = 'button' data-toggle='collapse'
            data-target = '#navbarNav' aria-controls = 'navbarNav'
            aria-expanded='false' aria-label='Toggle navigation'>
            <span class ='navbar-toggler-icon'></span>
            </button>
            <!-- 큰 화면일때 로그인 버튼 -->
            <div class = 'collapse navbar-collapse flex-grow-0' id='navbarNav'>
                <ul class = 'navbar-nav'>
                    <li class = 'nav-item'>
                        <a class = 'nav-link' href='#'>로그인</a>
                    </li>
                </ul>
            </div>
         </nav>
부트스트랩 자바스크립트 파일 추가
부트스트랩을 사용한 버튼은 자바스크립트 파일이 html에 포함되어 있어야 동작한다. 자바스크립트 파일은 제이쿼리를 기반으로 동작하므로, 1. 자바스크립트 파일과 2. 제이쿼리 파일을 추가해준다
Download jQuery | jQuery
link Downloading jQuery Compressed and uncompressed copies of jQuery files are available. The uncompressed file is best used during development or debugging; the compressed file saves bandwidth and improves performance in production. You can also download
jquery.com
compressed production으로 링크 저장

템플릿에서 include 사용
navbar.html 파일로 만든후, base.html에서 include로 재사용
# base.html

<body>
        {% include 'navbar.html' %}		# include 사용
        <!-- 기본 템플릿 안에 삽입될 내용 start -->
        {% block content %}
        {% endblock %}
            <!-- 기본 템플릿 안에 삽입될 내용 end -->
        <!-- jQuery JS -->
        <script src="{% static 'jquery-3.6.1.min.js' %}"></script>
        <!-- Bootstrap JS JS -->
        <script src="{% static 'bootstrap.min.js' %}"></script>

</body>
HTML 태그
<a> : 하이퍼링크
<a href = 'https://....' title = '표시할내용'>
<div> : 구역으로 묶음
<link> : 외부 파일 연결, css 파일을 외부에서 연결
<style> : css 파일을 내부에서 정의
<img src = '이미지 경로'>
HTML 입력 폼
Heroku로 배포하기
https://incomeplus.tistory.com/155
git init
git add .
git commit -m 'first'


heroku login
heroku git:remote -a 'app_name'

# file 만들기
requirement.txt		# django, gunicorn 설치
Procfile		# web: gunicorn appname.wsgi
runtime.txt		# python-3.10.8

git push heroku master

Heroku Truble Shooting
정상 동작시 log 참고
https://devcenter.heroku.com/articles/getting-started-with-python#deploy-the-app
project app 할일
requirements.txt, Procfile, runtime.txt 파일 만들기
# Procfile
web: gunicorn config.wsgi
web: gunicorn <app name>.wsgi

# runtime.txt
python-3.10.8
setting.py 수정
buildpack error
https://velog.io/@nemo/heroku-error-buildpack-nodejs
runtime.txt 만들기
Error while running '$ python manage.py collectstatic --noinput'
heroku config:set DISABLE_COLLECTSTATIC=1CSS 적용안됨 -> whitenoise 라이브러리 설치, 설정 추가
https://eveningdev.tistory.com/53
pip install gunicorn whitenoise dj-database-url psycopg2-binary
# settings.py

MIDDLEWARE = [...,
'whitenoise.middleware.WhiteNoiseMiddleware',
... ]

import dj_database_url
db_from_env = dj_database_url.config(conn_max_age=500)
DATABASES['default'].update(db_from_env)
어쨌든 성공...

'AI > 프로그래머스 AI 코스' 카테고리의 다른 글
| Flask (0) | 2022.10.13 |
|---|---|
| Git 요약 (0) | 2022.10.04 |
| MySQL (0) | 2022.09.28 |
| Selenium (0) | 2022.09.28 |
| BeautifulSoup4 (0) | 2022.09.27 |